Sunday evenings at Gran Quigley’s house meant cards. Not the polite kind. Cards with a deck slapped onto the table, a trump called, and somebody, usually somebody related to me, accusing somebody else of “wasting the five.” The game was 120s, and if you grew up around any branch of my mother’s family in Newfoundland, you grew up around it.
I assumed for years that this was a Quigley peculiarity. Then I started dating my wife, and over the holidays her family pulled out a deck and started bidding. Same game. Same arguments. It turns out that if you have Newfoundland relatives, the odds are good that 120s is somewhere in the kitchen too.
Where It Comes From
120s is descended from an old Irish trick-taking game called “Twenty-Five,” sometimes “Spoil Five,” brought to the Avalon Peninsula by Irish settlers in the 18th and 19th centuries. The Irish version is still played, but the Newfoundland branch evolved its own scoring system, its own little rule wrinkles, and its own name. You play to 120 points, hence the title.
The most readable rule reference I’ve found online is by Paul Rice, hosted on a Memorial University page that has been there for what feels like forever: Paul Rice’s 120 guide. It is the closest thing the game has to a canonical written source, and it lines up with the way I learned to play at the kitchen table.

Why It’s Also Called Growl
Around Newfoundland the game has another name: Growl. The story I’ve always heard, and it tracks with my own experience, is that “Growl” comes from the noise the table makes during play. Somebody reneges when they shouldn’t have. Somebody leads off-suit when their partner clearly signaled trump. Somebody throws away the five at the wrong moment. The growling starts.
It’s not really anger. It’s a particular Newfoundland register of mock outrage that lives somewhere between “you eejit” and “you’re alright.” But the volume is real. If you’ve never been at a 120s table on a Sunday night, picture four adults who love each other yelling about a card game for two hours straight. That’s Growl.
How the Game Plays
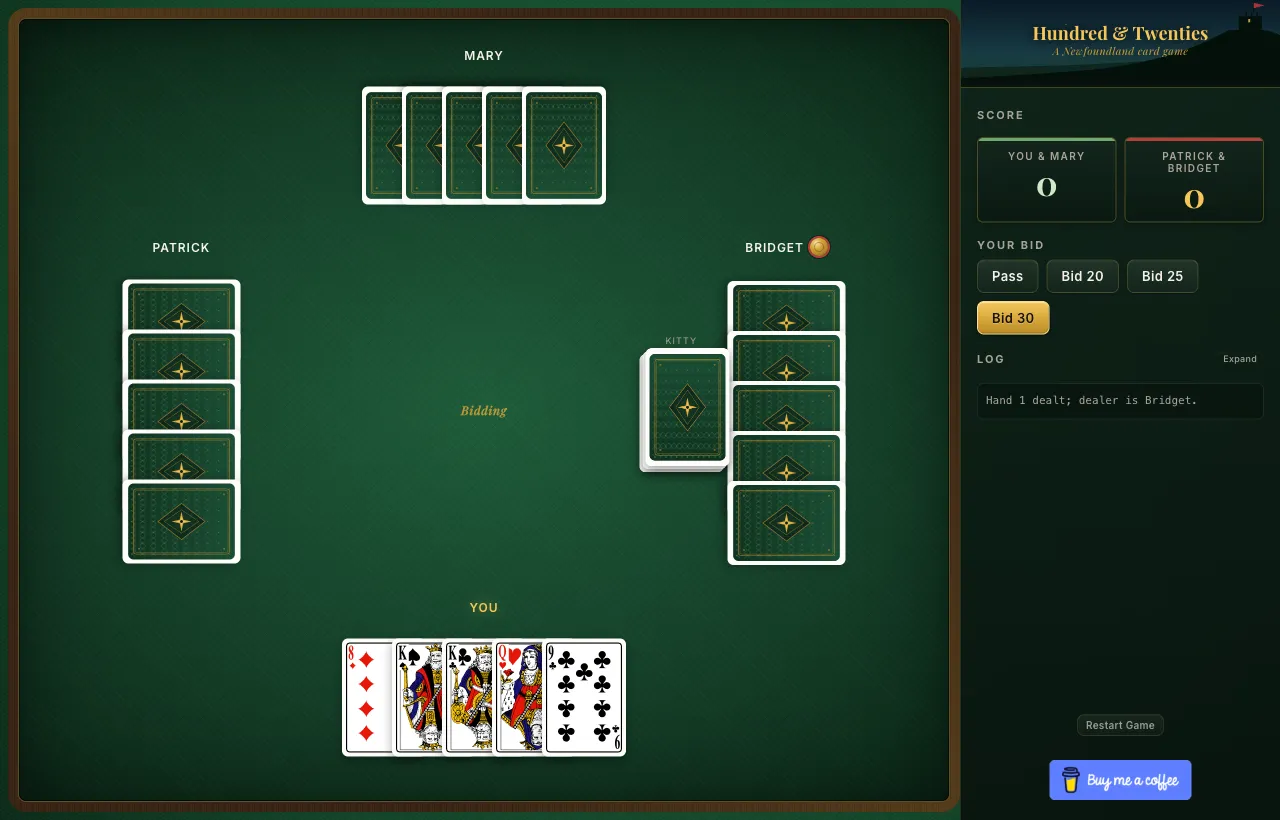
I’ll keep this short, since Paul Rice’s guide does the full job. The shape of a hand:
- Four players, two teams, partners sitting across from each other.
- Five cards each, plus a three-card “kitty” on the table.
- Bidding goes around once. You bid 20, 25, or 30 points based on how confident you are in your hand. If you have a five in your dealt hand and nobody has bid, you cannot pass; you must open the bidding. The dealer has the option to “take” a standing bid (match it without raising). If everyone passes, the dealer is stuck with a 20.
- Trump is named by the high bidder, who picks up the kitty, then discards back down to five.
- Five tricks are played. Each trick is worth five points. Whoever played the highest trump anywhere in the hand earns a five-point bonus.
- Bid 30 is the big one. A 30 bid is “for sixty,” and you have to win every trick. Make it and your team gets sixty points. Miss and you lose thirty.
The trump ranking is what trips up new players. It is not the standard A-K-Q-J order. The top of the trump suit goes:
- 5 of trump (the highest card in the game)
- Jack of trump
- Ace of Hearts (always trump, regardless of what suit was named)
- Ace of trump (collapses with the Ace of Hearts when hearts is trump)
- King of trump
- Queen of trump
- Then the pip cards, with a twist: highest in red, lowest in black. If trump is a red suit, the 10 outranks the 2. If trump is a black suit, the 2 outranks the 10. Don’t ask why. It just is.
There’s also a renege rule for the top three trumps (5, Jack, Ace of Hearts). When trump is led, you may withhold one of those cards if no higher trump is on the table. It rewards strong hands and punishes lazy leads. It also produces the most arguments.
The “must bid to win” rule is the one that keeps games honest at the end. If your team would otherwise reach 120 on a hand you didn’t bid, you stop at 115. You have to win a bid to win the game. There’s no slipping over the line on someone else’s mistake.
What Makes It Stick
I’ve thought about why this game travels so well across generations of Newfoundland families when so many other card games faded out. Part of it is that a hand only takes a couple of minutes, so you can play forty hands in an evening without it feeling long. Part of it is that the bidding gives every hand a story: somebody bid too high, somebody held back too low, somebody made an impossible 30. And part of it is that the renege rule and the bid-30 rule and the run-in tactics give partners genuinely useful information to argue about afterward. Growl is the byproduct of a game that actually rewards thinking.
I learned at Gran Quigley’s house. My wife learned at her grandmother’s. Same game, same noise, same kitchens, separated by a few bays. There are not many things that connect families in Newfoundland the way 120s does.
A Small Coda
I built a browser version of the game so I could play a hand when I’m away from a table. Four-player, AI opponents, all the rules I described above (the five-rule, the renege rule, the bid-30 trump-lead, the cap at 115). You can play it here. The growling has to be supplied by the player.